


Hi everyone! Sherry here with a layout using a blank water color paper to create my own background! So pull out your stash, play with some color and lets create together! In my last post, I shared with you my love for Magicals by Lindy's Stamp Gang. Today I wanted to share with you another awesome technique using this amazing product.

I started with a blank piece of water color paper. on my clean dry craft mat I sprinkled my two magical colors (summer lovin' sun and t-bird turquoise) keeping them close but not right on top of each other. (keep in mind where/how you want the color on your background) Spray it with water to activate the fabulousness of the Magicals. I started by laying my paper on the color in the middle of sheet. Then I dragged it towards the top, then dragged towards the bottom. (re apply color in this process will your happy with the mixture! Allow to dry.
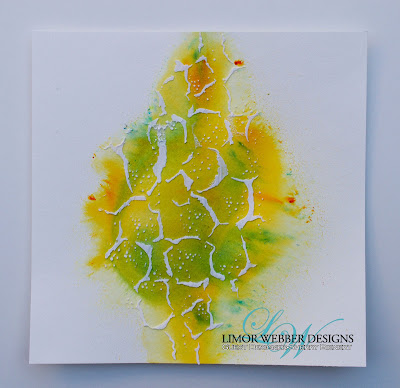

I applied whipped spackle through the 'cobblestone' stencil. I also applied a bit more of this same stencil along the edges of my photo. Allow both to dry.

I placed the photo where it will be in the end and traced around it with a Stabilo pencil. I sprayed the lines lightly with water and allowed to bleed. I LOVE the effect of the Stabilo what water is added!
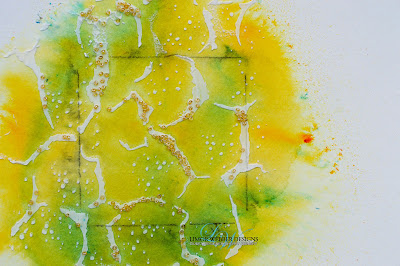

Apply some adhesive over some areas of the cobblestone and sprinkle some glass beads (butter) onto the adhesive and lightly press them into the glue. Allow to dry.

Here is a close up of the glass beads. The adhesive will dry clear, and the glass beads will be stuck for life.

Using IndigoBlu Limor Webber Designs stamps sets (border stamps and ink splats) and Lindy's Stamp Gang, Limor Webber Designs embossing powder (bonjour butter and chateau rose), I made impressions around the edges of where Stabilo pencil line.

Using Tim Holtz rub-ons I applied some images around the bottom right edges of the area the photo will be. Also add a few at the bottom right edge of the photo.


Using leftover pieces of small chain, I loosely laid it around the edges of the photo. once it was laid where I liked it, I applied small dots of liquid adhesive on different points of the chain to hold it in place. Allow to dry.

I had some scraps of cut off paper holes from a watercolor paper pad kicking around. So I stamped these pieces with more Limor Webber Designs 'border stamp' set with black ink. using pop dots I arranged two of these scraps, one sticking out from behind the photo and one overlapping on top.
I also added a small Tim Holts trinket peeking out the bottom of the photo.


Using pop dots I adhered this down to the background. To finish it all off I made loose circles around the photo to tie it into the background using white ink. Allow to dry.

Thank you so much for checking out another tutorial brought to you using the AMAZING Limor Webber Designs products! Everything was picked up from the online store. Pop in to check out what goodies are being released everyday!
For more inspiration, projects and product reviews check out:
Supplies
- IndigoBlu Limor Webber Designs Rugged Edges Stamp
- IndigoBlu Limor Webber Designs Ink Splats
- Lindy's Stamp Gang-Embossing Powder, Tres Chic
- Lindy's Stamp Gang - Magicals, Beauty School Dropout
- Watercolor Paper
- Faber-Castell Design Memory Craft® - Textural Accents - Whipped Spackle
- Stabilo pencil
- Tim Holtz, Rub-ons 'Life Quotes'
OTHER
- Prima Marketing - Stencil - Cobblestone (#962265)
- Prima Marketing - Art Basics - Glass Beads, Butter (#961701)
- Tim Holtz - Idea-o-logy Tokens 'Muse' (TH92676)
- Chain
Fantastic layout! I love how you used your magicals and can't wait to get mine out and play. Thanks for always inspiring us.
ReplyDeleteAbsolutely brilliant background!! Love the layers xx
ReplyDelete