


Hey all my crafty friends! Sherry here to share with you a little inspiration to start your day off right!

We are always so critical of ourselves and photos of ourselves, but we are just as important to remember and to document. We create around photos of our loved ones and other important things in our lives, but forget about ourselves. The photo I based this layout around is what I feel like when I am daydreaming, how I feel when I imagine beautiful things:)
Today I am sharing a different way to use your sprays! They are extremely versatile, and are more then just a spray bottle filled with color to be spritzed onto a page. Don't get me wrong, I adore a good spray any day of the week, but there is more to them then just a little spritz! So pull out your delicious colored sprays and play along!
This technique is best if applied to a neutral colored patterned paper. I chose Prima's Cartographer Collection - 'Les Yeux'
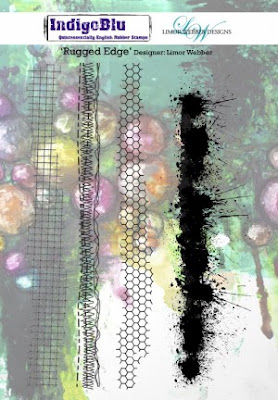
I started by using Limor Webber Designs 'Rugged Edge' stamps along the left and right edge of the paper. Then applied some Whipped Spackle through the Prima Donna Downey 'Turkish Grunge' stencil to create texture and create a path for the colors of spray. To add a bit of white space and to tie the first two layers together I applied Super Heavy Gesso through the Prima Finnabair Bubbles Stencil. I prefer Super Heavy Gesso for this as it will be completely white and thick so it holds it shape better than fluid or surface prep gesso.
I started by using Limor Webber Designs 'Rugged Edge' stamps along the left and right edge of the paper. Then applied some Whipped Spackle through the Prima Donna Downey 'Turkish Grunge' stencil to create texture and create a path for the colors of spray. To add a bit of white space and to tie the first two layers together I applied Super Heavy Gesso through the Prima Finnabair Bubbles Stencil. I prefer Super Heavy Gesso for this as it will be completely white and thick so it holds it shape better than fluid or surface prep gesso.

**not pictured** I applied this same stenciling to the top and right edge of the photo to be featured on this layout.

Next is the FUN part! I selected 4 colored sprays to enhance the texture that we made on the paper, Lindy's Stamp Gang Time Travel Teal, Orange Creamsicle, Pop Rock Purple and Raspberry Lemonade. Carefully unscrew all of the caps, and place them where you won't knock them over. I spritzed the side of the page I was working on with water. Work in one section at a time, so that you don't over saturate the paper. Using the 'straw' of the nozzle for your lightest color first, drag the color into the spots between the stenciled and texture areas. I rotated between the four colors allowing each to partially dry between colors. If the applied color doesn't run enough, simply spritz with water to get the pigment moving. I made sure to tilt the paper to manipulate where the colors would run and mix.

**not pictured**I applied the same colors to the edges of the feature photo around the gesso stenciling in the same style as the background.


To create a matte for my photo, I used the same spray colors and applied them to a transparency sheet. Since the transparency is a non porous surface, it takes a bit longer for the sprays to dry. Don't use a heat gun, as it will warp or melt the transparency.
I cut the first layer just bigger then the feature photo and adhered the photo centered on it. Making a bundle of black thread I adhered it to the back of this first matte. I cut the second matter to be a bit bigger then the first. Using pop dots I adhered this to the first matte/photo section.

Adhere the matted photo to the right side of the layout using more pop dots to add more depth.


Creating is important, documenting is important. One day we will be gone, and I like to think by creating pretty things we leave a bit of beauty. And by documenting events and people we will keep the memories going and help people after us remember!
Thank you so much for popping in to check out my tutorial using the ever amazing Limor Webber Designs products. Make sure to check out my Facebook and Instagram for more inspiration, tutorials and favorite products!
Feel free to peruse the rest of the DT Inspiration site, for some amazing tutorials by the ridiculously amazing Limor Webber Designs DT!
Funny thing, your husband called AGAIN!!! He said it's still ok to buy whatever you want ;)!!
Here is a good place to start!
Here is a good place to start!

Supplies:
- IndigoBlu Limor Webber Designs- Rugged Edge stamp set
- Lindy's Stamp Gang: Limor Webber Designs- Time Travel Teal, Orange Creamsicle, Pop Rock Purple and Raspberry Lemonade.
- Liquitex - Super Heavy Gesso
- Prima Donna Downey-'Turkish Grunge' stencil (#922351)
- Prima Finnabair Bubbles stencil (#961299)
- Cartographer collections - 'Les Yeux' (#990022)
I love your color choices it really helps to make your photo pop. You create the prettiest layouts. Thanks for sharing with us your process.
ReplyDeleteOne of my favourite Limor stamps and you've used it perfectly!! Love this xx
ReplyDelete